
[et_pb_section bb_built=”1″ admin_label=”section” fullwidth=”on” specialty=”off” inner_shadow=”off” parallax=”off” transparent_background=”off” background_color=”#ffffff” allow_player_pause=”off” parallax_method=”off” padding_mobile=”off” make_fullwidth=”off” use_custom_width=”off” width_unit=”on” make_equal=”off” use_custom_gutter=”off” module_class=”anthemSlider” custom_padding_tablet=”50px|0|50px|0″ custom_padding_last_edited=”on|desktop” next_background_color=”#191919″][et_pb_fullwidth_header title=”Rep Info” background_layout=”dark” text_orientation=”left” header_fullscreen=”off” header_scroll_down=”off” background_overlay_color=”rgba(104,110,114,0.25)” parallax=”off” parallax_method=”on” content_orientation=”center” image_orientation=”center” custom_button_one=”off” button_one_use_icon=”default” button_one_icon_placement=”right” button_one_on_hover=”on” button_one_letter_spacing_hover=”0″ custom_button_two=”off” button_two_use_icon=”default” button_two_icon_placement=”right” button_two_on_hover=”on” button_two_letter_spacing_hover=”0″ title_font_size=”60px” custom_css_main_element=”padding: 175px 0 140px;” subhead_font_size=”23px” module_class=”et-waypoint fadein-animated” background_url=”https://eliteform.com/wp-content/uploads/2016/12/0005_repInfoFeature.jpg” title_font_size_tablet=”48px” title_font_size_phone=”36px” title_font_size_last_edited=”on|phone” subhead=”ELITEFORM STRENGTHPLANNER” background_image=”https://eliteform.com/wp-content/uploads/2016/12/0005_repInfoFeature.jpg” content_max_width=”100%” background_color=”rgba(255, 255, 255, 0)” button_one_text_size__hover_enabled=”off” button_one_text_size__hover=”null” button_two_text_size__hover_enabled=”off” button_two_text_size__hover=”null” button_one_text_color__hover_enabled=”off” button_one_text_color__hover=”null” button_two_text_color__hover_enabled=”off” button_two_text_color__hover=”null” button_one_border_width__hover_enabled=”off” button_one_border_width__hover=”null” button_two_border_width__hover_enabled=”off” button_two_border_width__hover=”null” button_one_border_color__hover_enabled=”off” button_one_border_color__hover=”null” button_two_border_color__hover_enabled=”off” button_two_border_color__hover=”null” button_one_border_radius__hover_enabled=”off” button_one_border_radius__hover=”null” button_two_border_radius__hover_enabled=”off” button_two_border_radius__hover=”null” button_one_letter_spacing__hover_enabled=”on” button_one_letter_spacing__hover=”0″ button_two_letter_spacing__hover_enabled=”on” button_two_letter_spacing__hover=”0″ button_one_bg_color__hover_enabled=”off” button_one_bg_color__hover=”null” button_two_bg_color__hover_enabled=”off” button_two_bg_color__hover=”null” /][/et_pb_section][et_pb_section bb_built=”1″ fullwidth=”off” specialty=”off” transparent_background=”off” background_color=”#191919″ allow_player_pause=”off” inner_shadow=”off” parallax=”off” parallax_method=”off” padding_mobile=”off” make_fullwidth=”off” use_custom_width=”off” width_unit=”on” make_equal=”off” use_custom_gutter=”off” custom_padding_tablet=”50px|0|50px|0″ custom_padding_last_edited=”on|desktop” prev_background_color=”#ffffff” next_background_color=”#ffffff”][et_pb_row background_position=”top_left” background_repeat=”repeat” background_size=”initial”][et_pb_column type=”4_4″][et_pb_divider color=”#ffffff” show_divider=”off” divider_style=”solid” divider_position=”top” hide_on_mobile=”on” disabled_on=”on|on|off” /][/et_pb_column][/et_pb_row][/et_pb_section][et_pb_section bb_built=”1″ fullwidth=”off” specialty=”off” prev_background_color=”#191919″ next_background_color=”#1e83ec”][et_pb_row make_fullwidth=”off” use_custom_width=”off” width_unit=”on” use_custom_gutter=”off” padding_mobile=”off” allow_player_pause=”off” parallax=”off” parallax_method=”off” make_equal=”off” parallax_1=”off” parallax_method_1=”off” column_padding_mobile=”on” module_class=”anthemToggle” background_position=”top_left” background_repeat=”repeat” background_size=”initial”][et_pb_column type=”4_4″][et_pb_text use_border_color=”off” background_position=”top_left” background_repeat=”repeat” background_size=”initial” _builder_version=”3.16″]
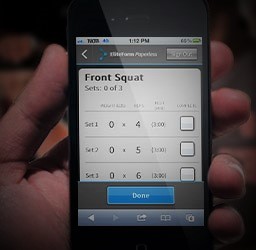
Rep Info is instructions on how exercises should be performed. These could be instructions like “clusters”, “each side”, or “weight vest”. Rep Info items are not associated with any one Exercise, so they can be specified as many times as necessary when designing a Workout Session.
Click Rep Info from the Team Setup menu to access the Rep Info page.
[/et_pb_text][et_pb_toggle admin_label=”Categories” title=”Categories” title_font=”|on|||” title_font_size=”24″ use_border_color=”off” closed_toggle_background_color=”#ffffff” custom_css_toggle_icon=”font-size: 24px;” title_font_size_tablet=”20″ title_font_size_phone=”16″ title_font_size_last_edited=”on|phone” saved_tabs=”all” module_class=”anthemToggleBlue” background_position=”top_left” background_repeat=”repeat” background_size=”initial” _builder_version=”3.16″]
Categories are uniquely-named groups of Athletes. Categories can be used to quickly select Athletes when adding Athletes to Workouts or when generating reports. An Athlete can be assigned to more than one Category.
Click Categories from the Team Setup menu to access the Categories page.
Add Category
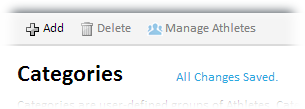
1. Click Add on the Tool Bar.
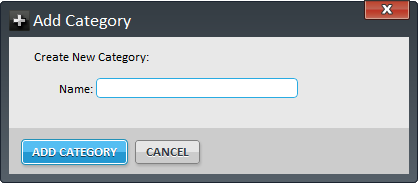
2. The Add Category box is displayed. Enter a name for the Category and click ADD CATEGORY.
3. The new Category is displayed.
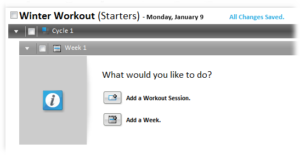
Note: Any changes made are saved automatically. The status of saved changes is displayed below the Tool Bar.
Edit Category Name
To change the name of an existing Category, just make the necessary changes on the Categories page.
Note: Any changes made are saved automatically. The status of saved changes is displayed below the Tool Bar.
Add/Remove Athletes From A Category
1. Select the appropriate Category.
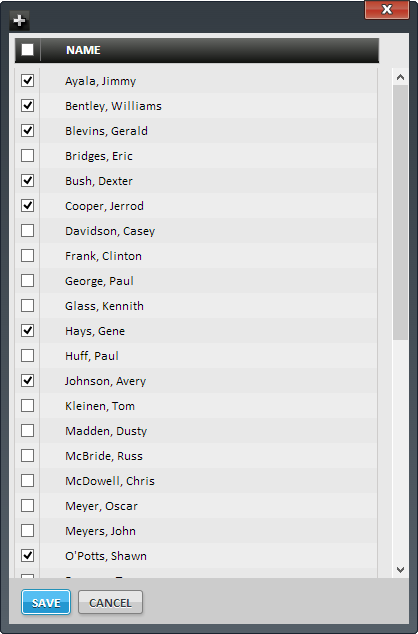
2. Click the Manage Athletes on the Tool Bar.
3. A box is displayed listing all available Athletes. Select the checkbox next to any Athletes that should be added to the Category or clear the check box next to any Athletes that should be removed from the Category, and click SAVE.
Note: Any changes made are saved automatically. The status of saved changes is displayed below the Tool Bar.
Delete Category
1. Select the Category to delete.
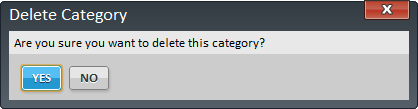
2. Click the Delete button on the Tool Bar.
3. The Delete Category box is displayed. Click YES.
Note: Any changes made are saved automatically. The status of saved changes is displayed below the Tool Bar.
[/et_pb_toggle][et_pb_toggle admin_label=”Competition Groups” title=”Competition Groups” title_font=”|on|||” title_font_size=”24″ use_border_color=”off” closed_toggle_background_color=”#ffffff” custom_css_toggle_icon=”font-size: 24px;” title_font_size_tablet=”20″ title_font_size_phone=”16″ title_font_size_last_edited=”on|phone” saved_tabs=”all” module_class=”anthemToggleBlue” background_position=”top_left” background_repeat=”repeat” background_size=”initial” _builder_version=”3.16″]
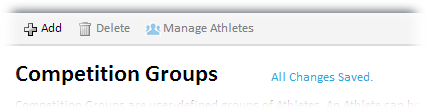
Competition Groups are coach-defined groups of Athletes created for the purpose of fostering competition on an Exercise by Exercise basis during workout sessions.
Add Competition Group
1. Click Add on the Tool Bar.
2. The Add Competition Group box is displayed. Enter a name for the group and click ADD COMPETITION GROUP.
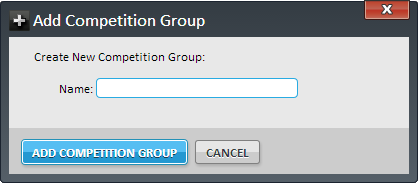
3. The new Competition Group is displayed.
Note: Any changes made are saved automatically. The status of saved changes is displayed below the Tool Bar.
Edit Competition Group Name
To change the name of an existing Competition Group, just make the necessary changes on the Competition Groups page.
Note: Any changes made are saved automatically. The status of saved changes is displayed below the Tool Bar.
Add/Remove Athletes From A Competition Group
1. Select the appropriate Competition Group.
2. Click the Manage Athletes on the Tool Bar.
3. A box is displayed listing all available Athletes. Select the checkbox next to any Athletes that should be added to the Competition Group or clear the check box next to any Athletes that should be removed from the Competition Group, and click SAVE.

Note: Any changes made are saved automatically. The status of saved changes is displayed below the Tool Bar.
Delete Competition Group
1. Select the Competition Group to delete.
2. Click the Delete button on the Tool Bar.
3. The Delete Competition Group box is displayed. Click YES.

Note: Any changes made are saved automatically. The status of saved changes is displayed below the Tool Bar.
[/et_pb_toggle][et_pb_toggle admin_label=”Exercise Groups” title=”Exercise Groups” title_font=”|on|||” title_font_size=”24″ use_border_color=”off” closed_toggle_background_color=”#ffffff” custom_css_toggle_icon=”font-size: 24px;” title_font_size_tablet=”20″ title_font_size_phone=”16″ title_font_size_last_edited=”on|phone” saved_tabs=”all” module_class=”anthemToggleBlue” background_position=”top_left” background_repeat=”repeat” background_size=”initial” _builder_version=”3.16″]
Exercise Groups are a way to categorize and name groups of Exercises performed during Workout Sessions. Exercise Groups could have names like “Pre-Workout”, “Primary”, “Strength”, and “Speed”. When Exercise Groups are used in Workout designs, they are also displayed on printed strength cards and on EliteForm Integrated touch screens.
Click Exercise Groups from the Team Setup menu to access the Exercise Groups page.
Add Exercise Group
1. Click Add on the Tool Bar.
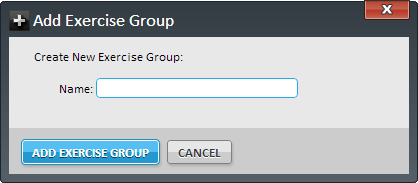
2. The Add Exercise Group box is displayed. Enter a name for the group and click ADD EXERCISE GROUP.
3. The new Exercise Group is displayed.
Note: Any changes made are saved automatically. The status of saved changes is displayed below the Tool Bar.
Delete Exercise Group
1. Select the group to delete.
2. Click the Delete button on the Tool Bar.
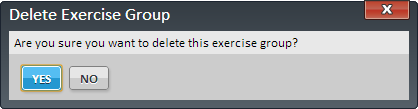
3. The Delete Exercise Group box is displayed. Click YES.
Note: Any changes made are saved automatically. The status of saved changes is displayed below the Tool Bar.
[/et_pb_toggle][et_pb_toggle admin_label=”Performance Tests” title=”Performance Tests” title_font=”|on|||” title_font_size=”24″ use_border_color=”off” closed_toggle_background_color=”#ffffff” custom_css_toggle_icon=”font-size: 24px;” title_font_size_tablet=”20″ title_font_size_phone=”16″ title_font_size_last_edited=”on|phone” saved_tabs=”all” module_class=”anthemToggleBlue” background_position=”top_left” background_repeat=”repeat” background_size=”initial” _builder_version=”3.16″]
Performance Tests are physical assessments completed by Athletes to help track growth and development. After Performance Tests are completed, the results can be entered into StrengthPlanner for historical tracking and reporting.
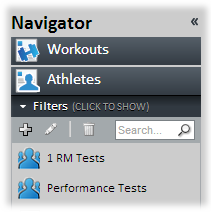
Click Performance Tests from the Team Setup menu to access the Performance Tests page.
Add Performance Test
1. Click Add on the Tool Bar.
2. The Add Performance Test box is displayed. Specify the following and click the ADD TEST button:
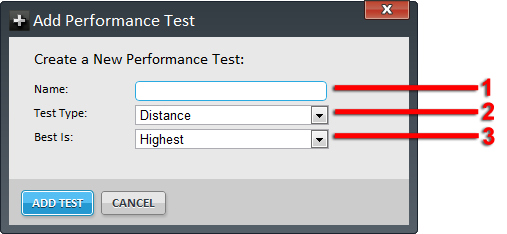
1 – Name – The name of the Performance Test.
2 – Test Type – How the performance of the test is judged. Values are Distance, Time and Weight.
3 – Best Is – Indicates which value is considered best for the test. Values are Highest and Lowest.
3. The new Performance Test is displayed on the Performance Tests page.
Note: Any changes made are saved automatically. The status of saved changes is displayed below the Tool Bar.
Edit Performance Test
To make any changes to an existing Performance Test, just make the necessary changes on the Performance Tests page.
Note: Any changes made are saved automatically. The status of saved changes is displayed below the Tool Bar.
1. Select the Performance Test to delete.
2. Click Delete on the Tool Bar.
3. The Delete Performance Test box is displayed. Click YES.
Note: Any changes made are saved automatically. The status of saved changes is displayed below the Tool Bar.
[/et_pb_toggle][et_pb_toggle admin_label=”Positions” title=”Positions” title_font=”|on|||” title_font_size=”24″ use_border_color=”off” closed_toggle_background_color=”#ffffff” custom_css_toggle_icon=”font-size: 24px;” title_font_size_tablet=”20″ title_font_size_phone=”16″ title_font_size_last_edited=”on|phone” saved_tabs=”all” module_class=”anthemToggleBlue” background_position=”top_left” background_repeat=”repeat” background_size=”initial” _builder_version=”3.16″]
Positions are the roles involved in the selected sport.
Click Positions from the Team Setup menu to access the Positions page.
Add Position
1. Click Add on the Tool Bar.
2. The Add Position box is displayed. Specify the appropriate values and click the ADD POSITION button.
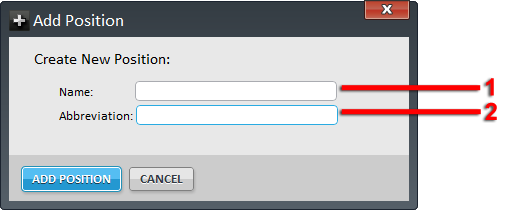
1 – Name -The name of the Position.
2 – Abbreviation – The abbreviated version of the Position name. This value is limited to four characters in length.
3. The new Position is displayed on the Positions page.
Note: Any changes made are saved automatically. The status of saved changes is displayed below the Tool Bar.
Edit Position
To make any changes to an existing Position, just make the necessary changes on the Positions page.
Note: Any changes made are saved automatically. The status of saved changes is displayed below the Tool Bar.
Delete Position
1. Select the Position to delete.
2. Click Delete on the Tool Bar.
3. The Delete Position box is displayed. Click YES.
Note: Any changes made are saved automatically. The status of saved changes is displayed below the Tool Bar.
[/et_pb_toggle][et_pb_toggle admin_label=”Rep Info” title=”Rep Info” title_font=”|on|||” title_font_size=”24″ use_border_color=”off” closed_toggle_background_color=”#ffffff” custom_css_toggle_icon=”font-size: 24px;” title_font_size_tablet=”20″ title_font_size_phone=”16″ title_font_size_last_edited=”on|phone” saved_tabs=”all” module_class=”anthemToggleBlue” background_position=”top_left” background_repeat=”repeat” background_size=”initial” _builder_version=”3.16″]
Add Rep Info
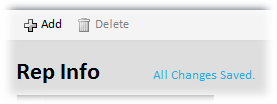
1. Click Add on the Tool Bar.
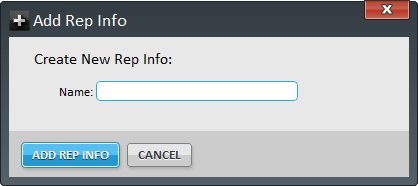
2. The Add Rep Info box is displayed. Enter the Name of the new Rep Info and click the ADD REP INFO button.
3. The new Rep Info is displayed on the Rep Info page.
Note: Any changes made are saved automatically. The status of saved changes is displayed below the Tool Bar.
Edit Rep Info
To make any changes to existing Rep Info, just make the necessary changes on the Rep Info page.
Note: Any changes made are saved automatically. The status of saved changes is displayed below the Tool Bar.
Delete Rep Info
1. Select the Rep Info to delete.
2. Click Delete on the Tool Bar.
3. The Delete Rep Info box is displayed. Click YES.
Note: Any changes made are saved automatically. The status of saved changes is displayed below the Tool Bar.
[/et_pb_toggle][et_pb_toggle admin_label=”Seasons” title=”Seasons” title_font=”|on|||” title_font_size=”24″ use_border_color=”off” closed_toggle_background_color=”#ffffff” custom_css_toggle_icon=”font-size: 24px;” title_font_size_tablet=”20″ title_font_size_phone=”16″ title_font_size_last_edited=”on|phone” saved_tabs=”all” module_class=”anthemToggleBlue” background_position=”top_left” background_repeat=”repeat” background_size=”initial” _builder_version=”3.16″]
Seasons are unique periods of time for the selected sport, typically based around the academic school year. Seasons contain the Workouts, Cycles, Weeks and Sessions from which strength cards are created. In addition to specifying the start and end dates when creating Seasons, you can also specify which Athletes will be active for that Season and their Classification (e.g., Freshman, Sophomore, Junior, Senior).
Click Seasons from the Team Setup menu to access the Seasons page.
Add Season
1. Click Add on the Tool Bar.
2. The Add Season box is displayed. Specify the appropriate values and click SAVE SEASON.
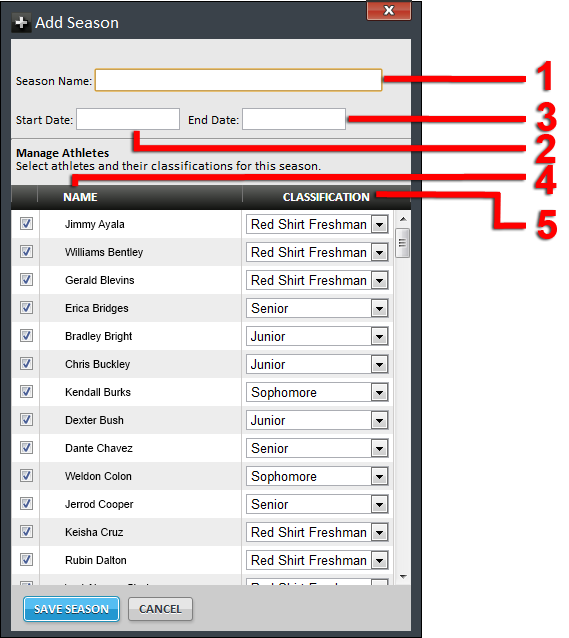
1 – Season Name – The name of the Season.
2 – Start Date – The start date of the Season.
3 – End Date – The end date of the Season.
4 – Name – The name of the Athlete.
5 – Classification – The Classification of the Athlete.
3. The new Season is displayed.
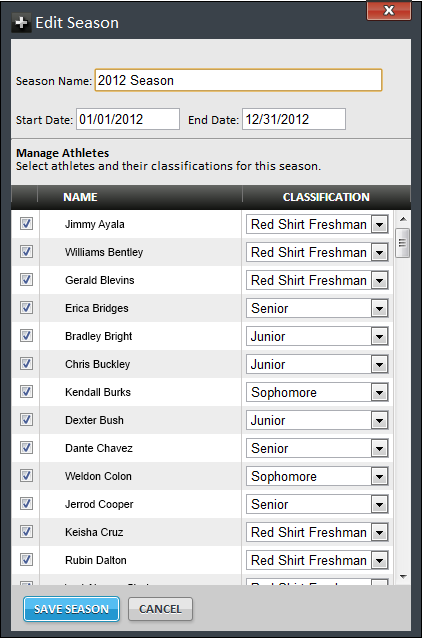
Edit Season
1. Click Edit on the Tool Bar.
2. The Edit Season box is displayed. Make the necessary changes and click SAVE SEASON.
[/et_pb_toggle][/et_pb_column][/et_pb_row][/et_pb_section][et_pb_section bb_built=”1″ fullwidth=”off” specialty=”off” transparent_background=”off” background_color=”#1e83ec” allow_player_pause=”off” inner_shadow=”off” parallax=”off” parallax_method=”off” padding_mobile=”on” make_fullwidth=”off” use_custom_width=”off” width_unit=”on” make_equal=”off” use_custom_gutter=”off” custom_padding=”20px||5px|” disabled_on=”off|off|off” disabled=”off” module_class=”anthemSlimOptin” custom_css_main_element=”background-image: -webkit-gradient(linear, left bottom, right top, from(#62d8e4), to(#26baf2));||background-image: -webkit-linear-gradient(left bottom, #62d8e4, #26baf2);||background-image: -moz-linear-gradient(left bottom, #62d8e4, #26baf2);||background-image: -o-linear-gradient(left bottom, #62d8e4, #26baf2);||background-image: -ms-linear-gradient(left bottom, #62d8e4, #26baf2);||background-image: linear-gradient(left bottom, #62d8e4, #26baf2);||filter: progid:DXImageTransform.Microsoft.gradient(GradientType=1,StartColorStr=’#62d8e4′, EndColorStr=’#26baf2′);||” custom_padding_tablet=”20px||5px|” prev_background_color=”#ffffff”][et_pb_row make_fullwidth=”off” use_custom_width=”off” width_unit=”on” use_custom_gutter=”off” custom_padding=”0px||0px|” padding_mobile=”on” allow_player_pause=”off” parallax=”off” parallax_method=”off” make_equal=”off” parallax_1=”off” parallax_method_1=”off” column_padding_mobile=”on” parallax_2=”off” parallax_method_2=”off” background_position=”top_left” background_repeat=”repeat” background_size=”initial”][et_pb_column type=”1_2″][et_pb_text admin_label=”Title” background_layout=”dark” text_orientation=”left” use_border_color=”off” border_color=”#ffffff” border_style=”solid” text_font=”|||on|” text_font_size=”30″ custom_css_main_element=”font-weight: 900;” custom_margin=”||0px|” custom_padding=”||5px|” module_class=”anthemSlimOptinTitle” custom_padding_tablet=”||0px|” custom_padding_last_edited=”on|phone” custom_padding_phone=”||5px|” background_position=”top_left” background_repeat=”repeat” background_size=”initial”]
Want to know what’s new?
[/et_pb_text][et_pb_text background_layout=”dark” text_orientation=”left” use_border_color=”off” border_color=”#ffffff” border_style=”solid” custom_margin=”||0px|” custom_padding=”||0px|” custom_padding_tablet=”||10px|” custom_padding_last_edited=”on|tablet” text_line_height=”1.4em” background_position=”top_left” background_repeat=”repeat” background_size=”initial”]
We’ll be happy to keep you up to speed
[/et_pb_text][/et_pb_column][et_pb_column type=”1_2″][et_pb_contact_form admin_label=”Slim Opt-in 2 Fields” captcha=”off” use_redirect=”off” input_border_radius=”3″ use_border_color=”off” border_color=”#ffffff” border_style=”solid” custom_button=”on” button_use_icon=”off” button_icon_placement=”right” button_on_hover=”on” button_letter_spacing_hover=”4″ title_text_color=”#ffffff” button_text_color=”#ffffff” button_bg_color=”#50d18d” button_bg_color_hover=”#58e896″ button_letter_spacing_hover_last_edited=”on|phone” module_class=”anthemSlimOptinTwoFields” border_radii=”on|3px|3px|3px|3px”][et_pb_contact_field field_title=”Name” field_type=”input” field_id=”Name” required_mark=”on” fullwidth_field=”off” field_background_color=”#ffffff” input_border_radius=”0″ form_field_font_select=”default” form_field_font=”||||” use_border_color=”off” border_style=”solid”] [/et_pb_contact_field][et_pb_contact_field field_title=”Email” field_type=”email” field_id=”Email” required_mark=”on” fullwidth_field=”off” field_background_color=”#ffffff” input_border_radius=”0″ form_field_font_select=”default” form_field_font=”||||” use_border_color=”off” border_style=”solid”] [/et_pb_contact_field][/et_pb_contact_form][/et_pb_column][/et_pb_row][/et_pb_section]